🎯 Covering key GitHub terminology.
🎯 Walk through GitHub.
🎯 Creating our first Hello World Project.
🎯 Personalising GitHub.
🎯 Sharing good repositories to star.
🎯 Finding good users to follow.
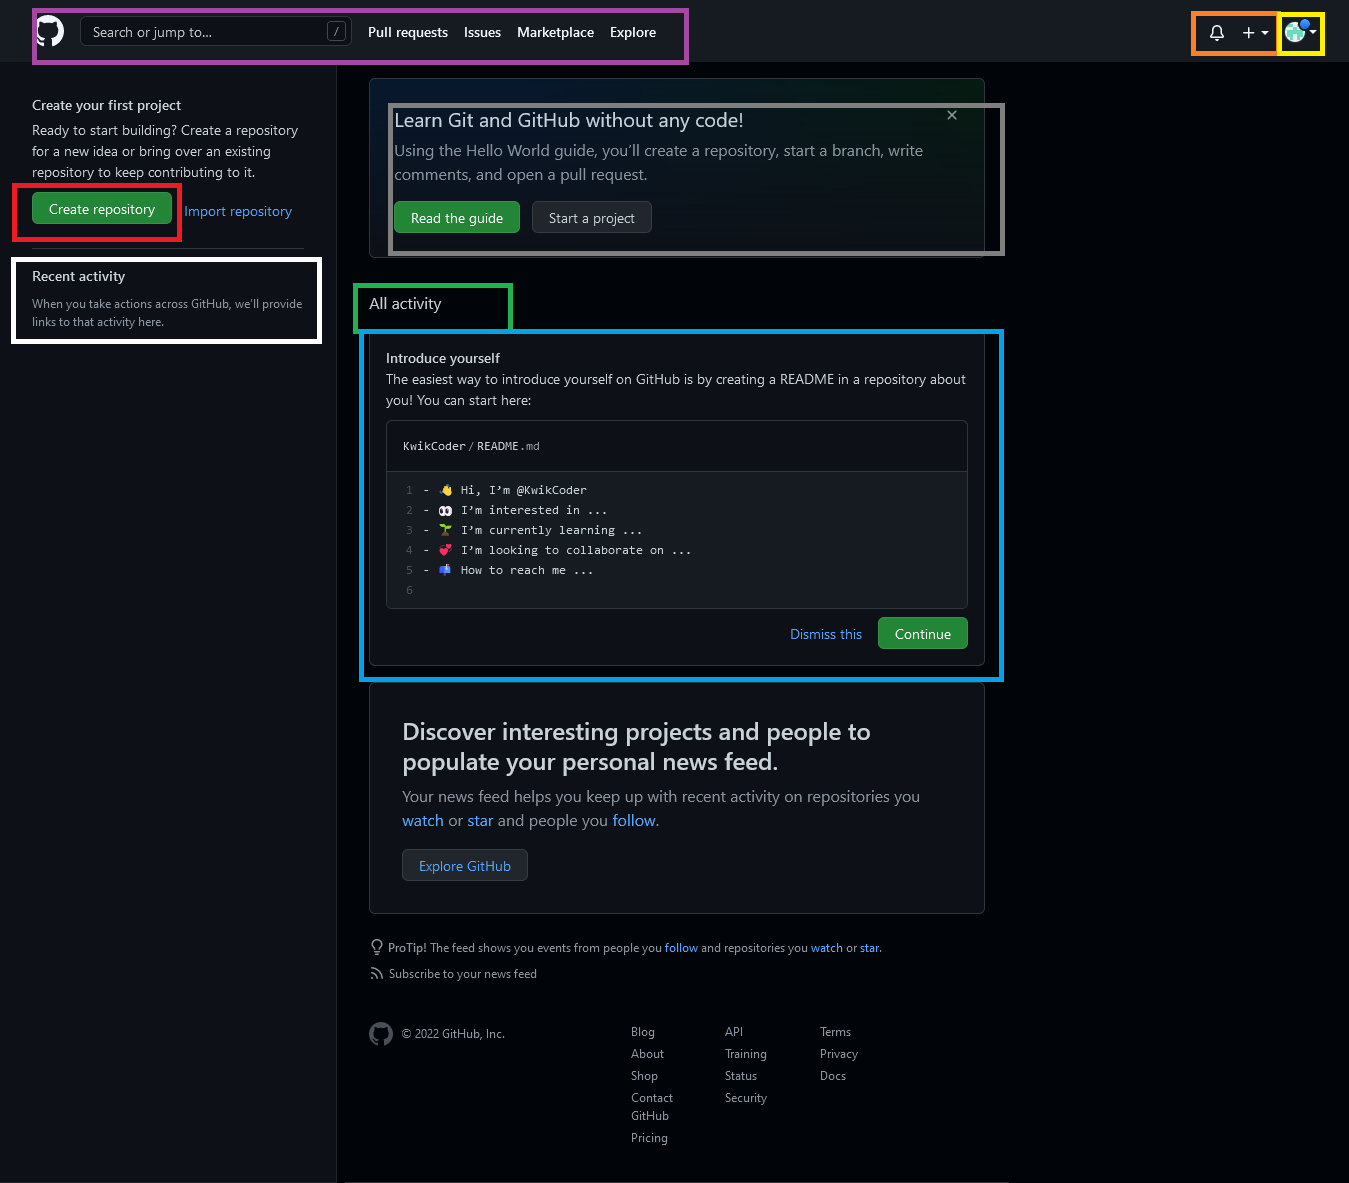
🟣 = This top navigation will send you to all your open 👉 issues
👈,
👉 Pull Requests 👈 ,
👉 GitHub Marketplace👈 and to explore others work.
🟠 = Whatever activity you are a part of in GitHub, you will get notifications, that will show up
next to the bell. The plus icon lets you create repos, files and more.
🟡 = Your profile and settings and all your work will show up here. We will cover this more later.
Grey = Here, we will create a new repo, the original Hello World. We will cover this later as well.
🐻❄️ (white) = All your issues, and open pull reuqests will show as recent activity.
🟢 = Whoever you follow, whoever's project you are watching, all their activity will show up their.
🔵 = Here, you make your own profile readme, where others will see a quick overview of you, we will
discuss this later!
1️⃣ Lets make a repository:
As seen in the above color coded image, see the button that says Create repository , outlined in red and click it!
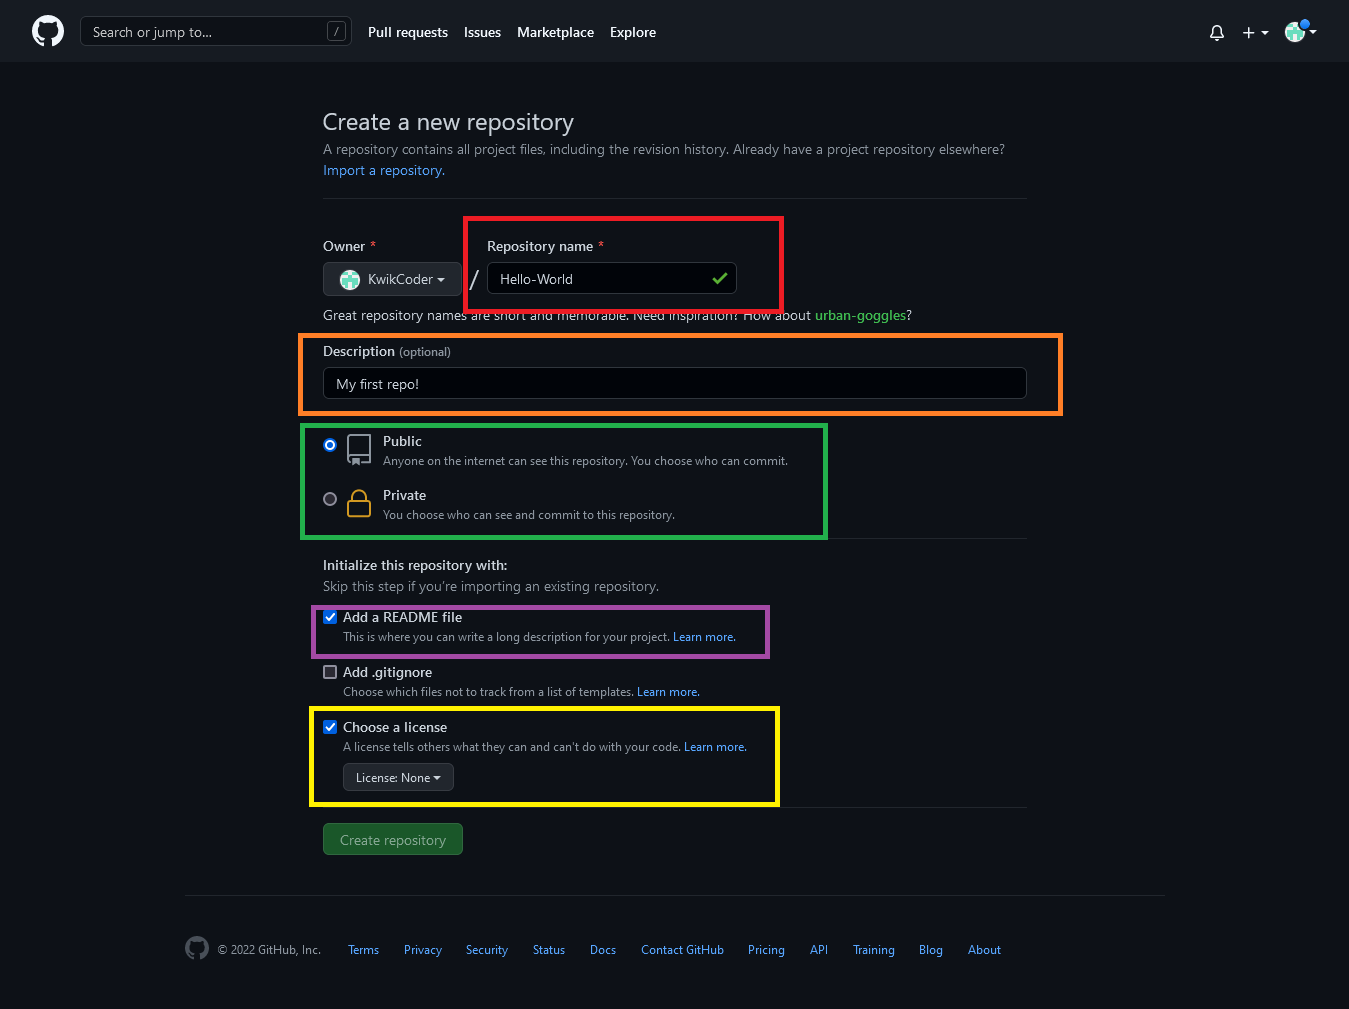
🔴 = Here, you add a suitable name for your repo, in this case, Hello World .
🟠 = Here, you add a quick simple intro about your repo.
🟢 = If you choose to set your repo as public, you allow others on the internet to view your work.
If it is confidential, the set it as private.
🟣 = Add a README.md for a longer aesthetically pleasing description about your work.
🟡 = Pick a license, we use MIT.
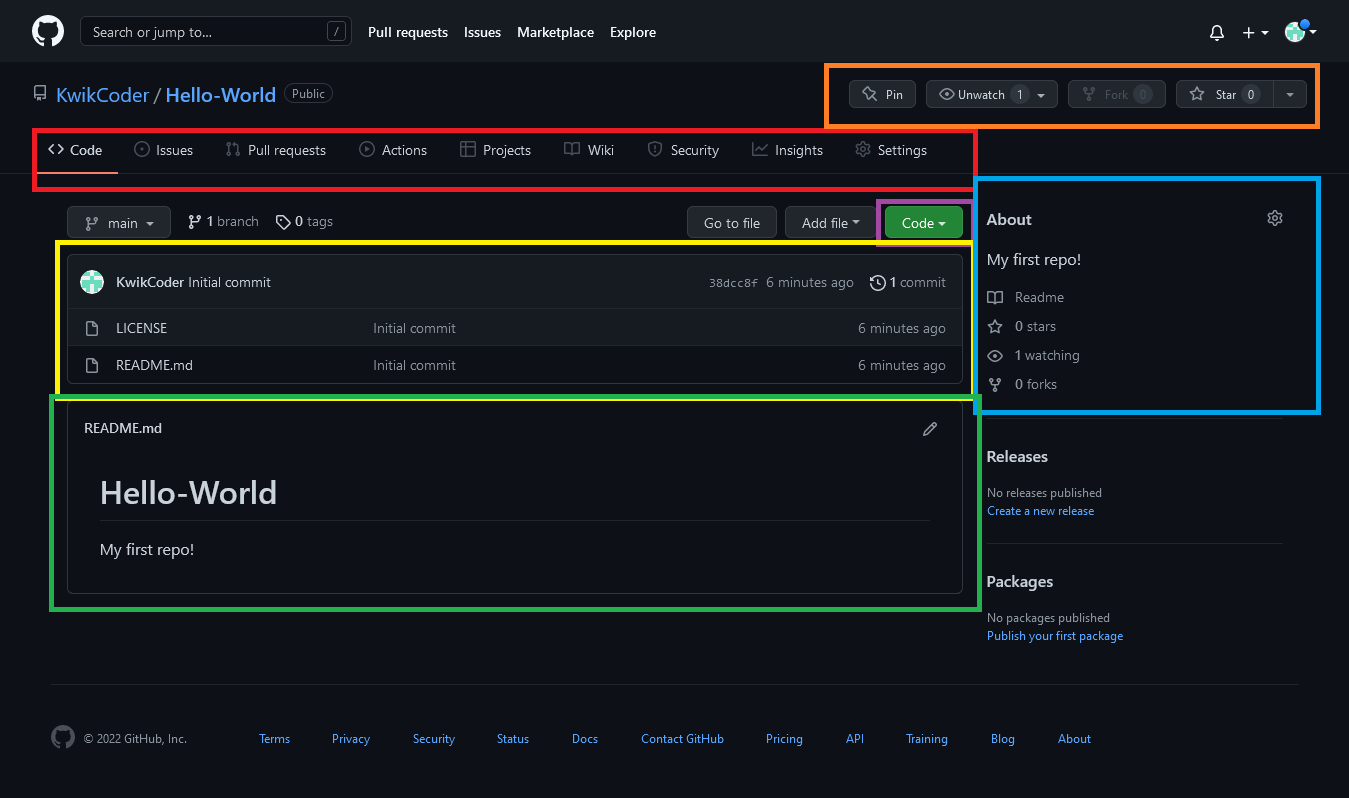
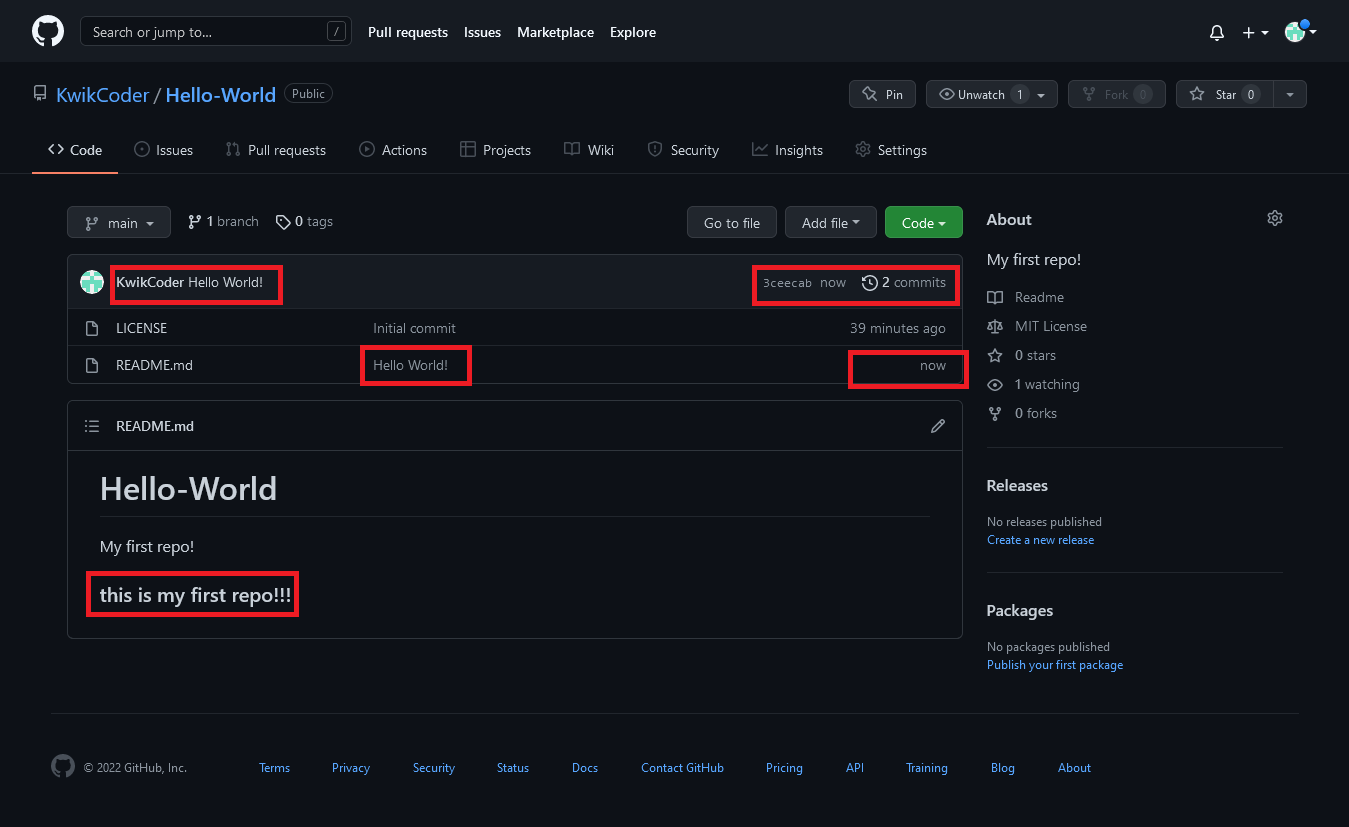
🟠 = Here, you can star, fork (get your own copy) and watch the activity of your repository.
🔴 = You can see the dashboard of all your work and settings.
🟡 = Here are all the files of your code.
🔵 = Now, you can edit your description, and see those who are involved with your repo.
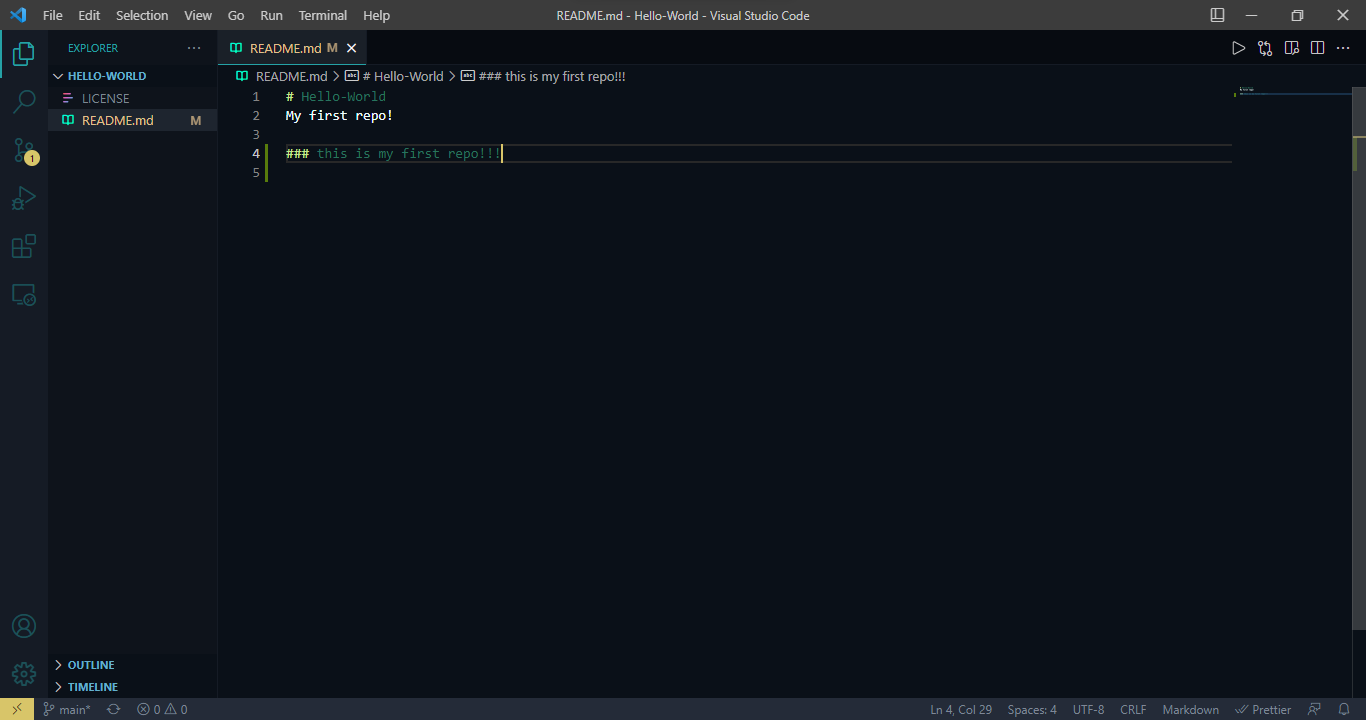
🟢 = Where the README.md is. You can style it using 👉 Markdown 👈
🟣 = What to press to clone. https://github.com/USERNAME/REPO.git
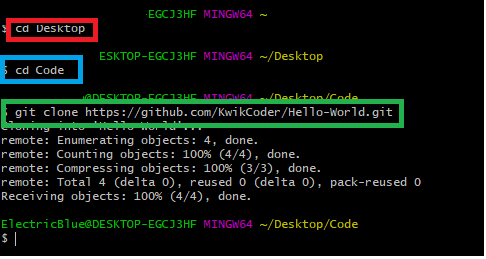
Use this to learn about Command Prompt: https://www.techrepublic.com/article/16-terminal-commands-every-user-should-know/
🎯 Now, we open up where we saved the repo, to make the code changes.
📝 Repository : A project, where all the code is kept.
📝 Pull Request : A draft of code, where others check, review and approve it, before it is
merged, to the acutal main code.
📝 README.md : A file that contains the information about the other files in the directory.
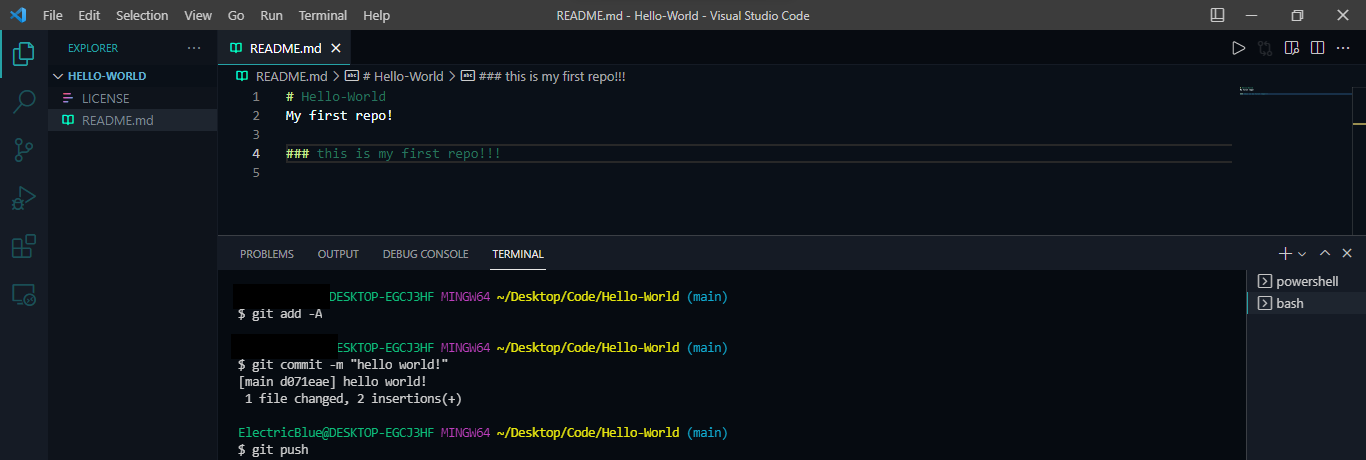
📝 Git: Language that tracks the changes that are made in the local copy of your repo
(repository) to update the remote copy.
To push all your code to the remote work, you need Git Bash:
👉 Download Git Bash 👈
Stackoverflow, the home of code questions!

Enjoy learning to code!